Connect Microsoft Entra ID (formerly Azure Active Directory) to SurrealDB to allow members of your organisation to sign in with their Microsoft accounts. You register an application in the Microsoft Entra admin center, then enter its details in a new connection in SurrealDB Studio.
Before you start, verify the email domain your company uses. You also need an Entra account that can register applications.
If your company buys software through Azure, SurrealDB Cloud can be billed on your Azure account as well. See Azure Marketplace.
Step 1: Register an application
In the Microsoft Entra admin center, open Entra ID, then App registrations.
Select New registration.
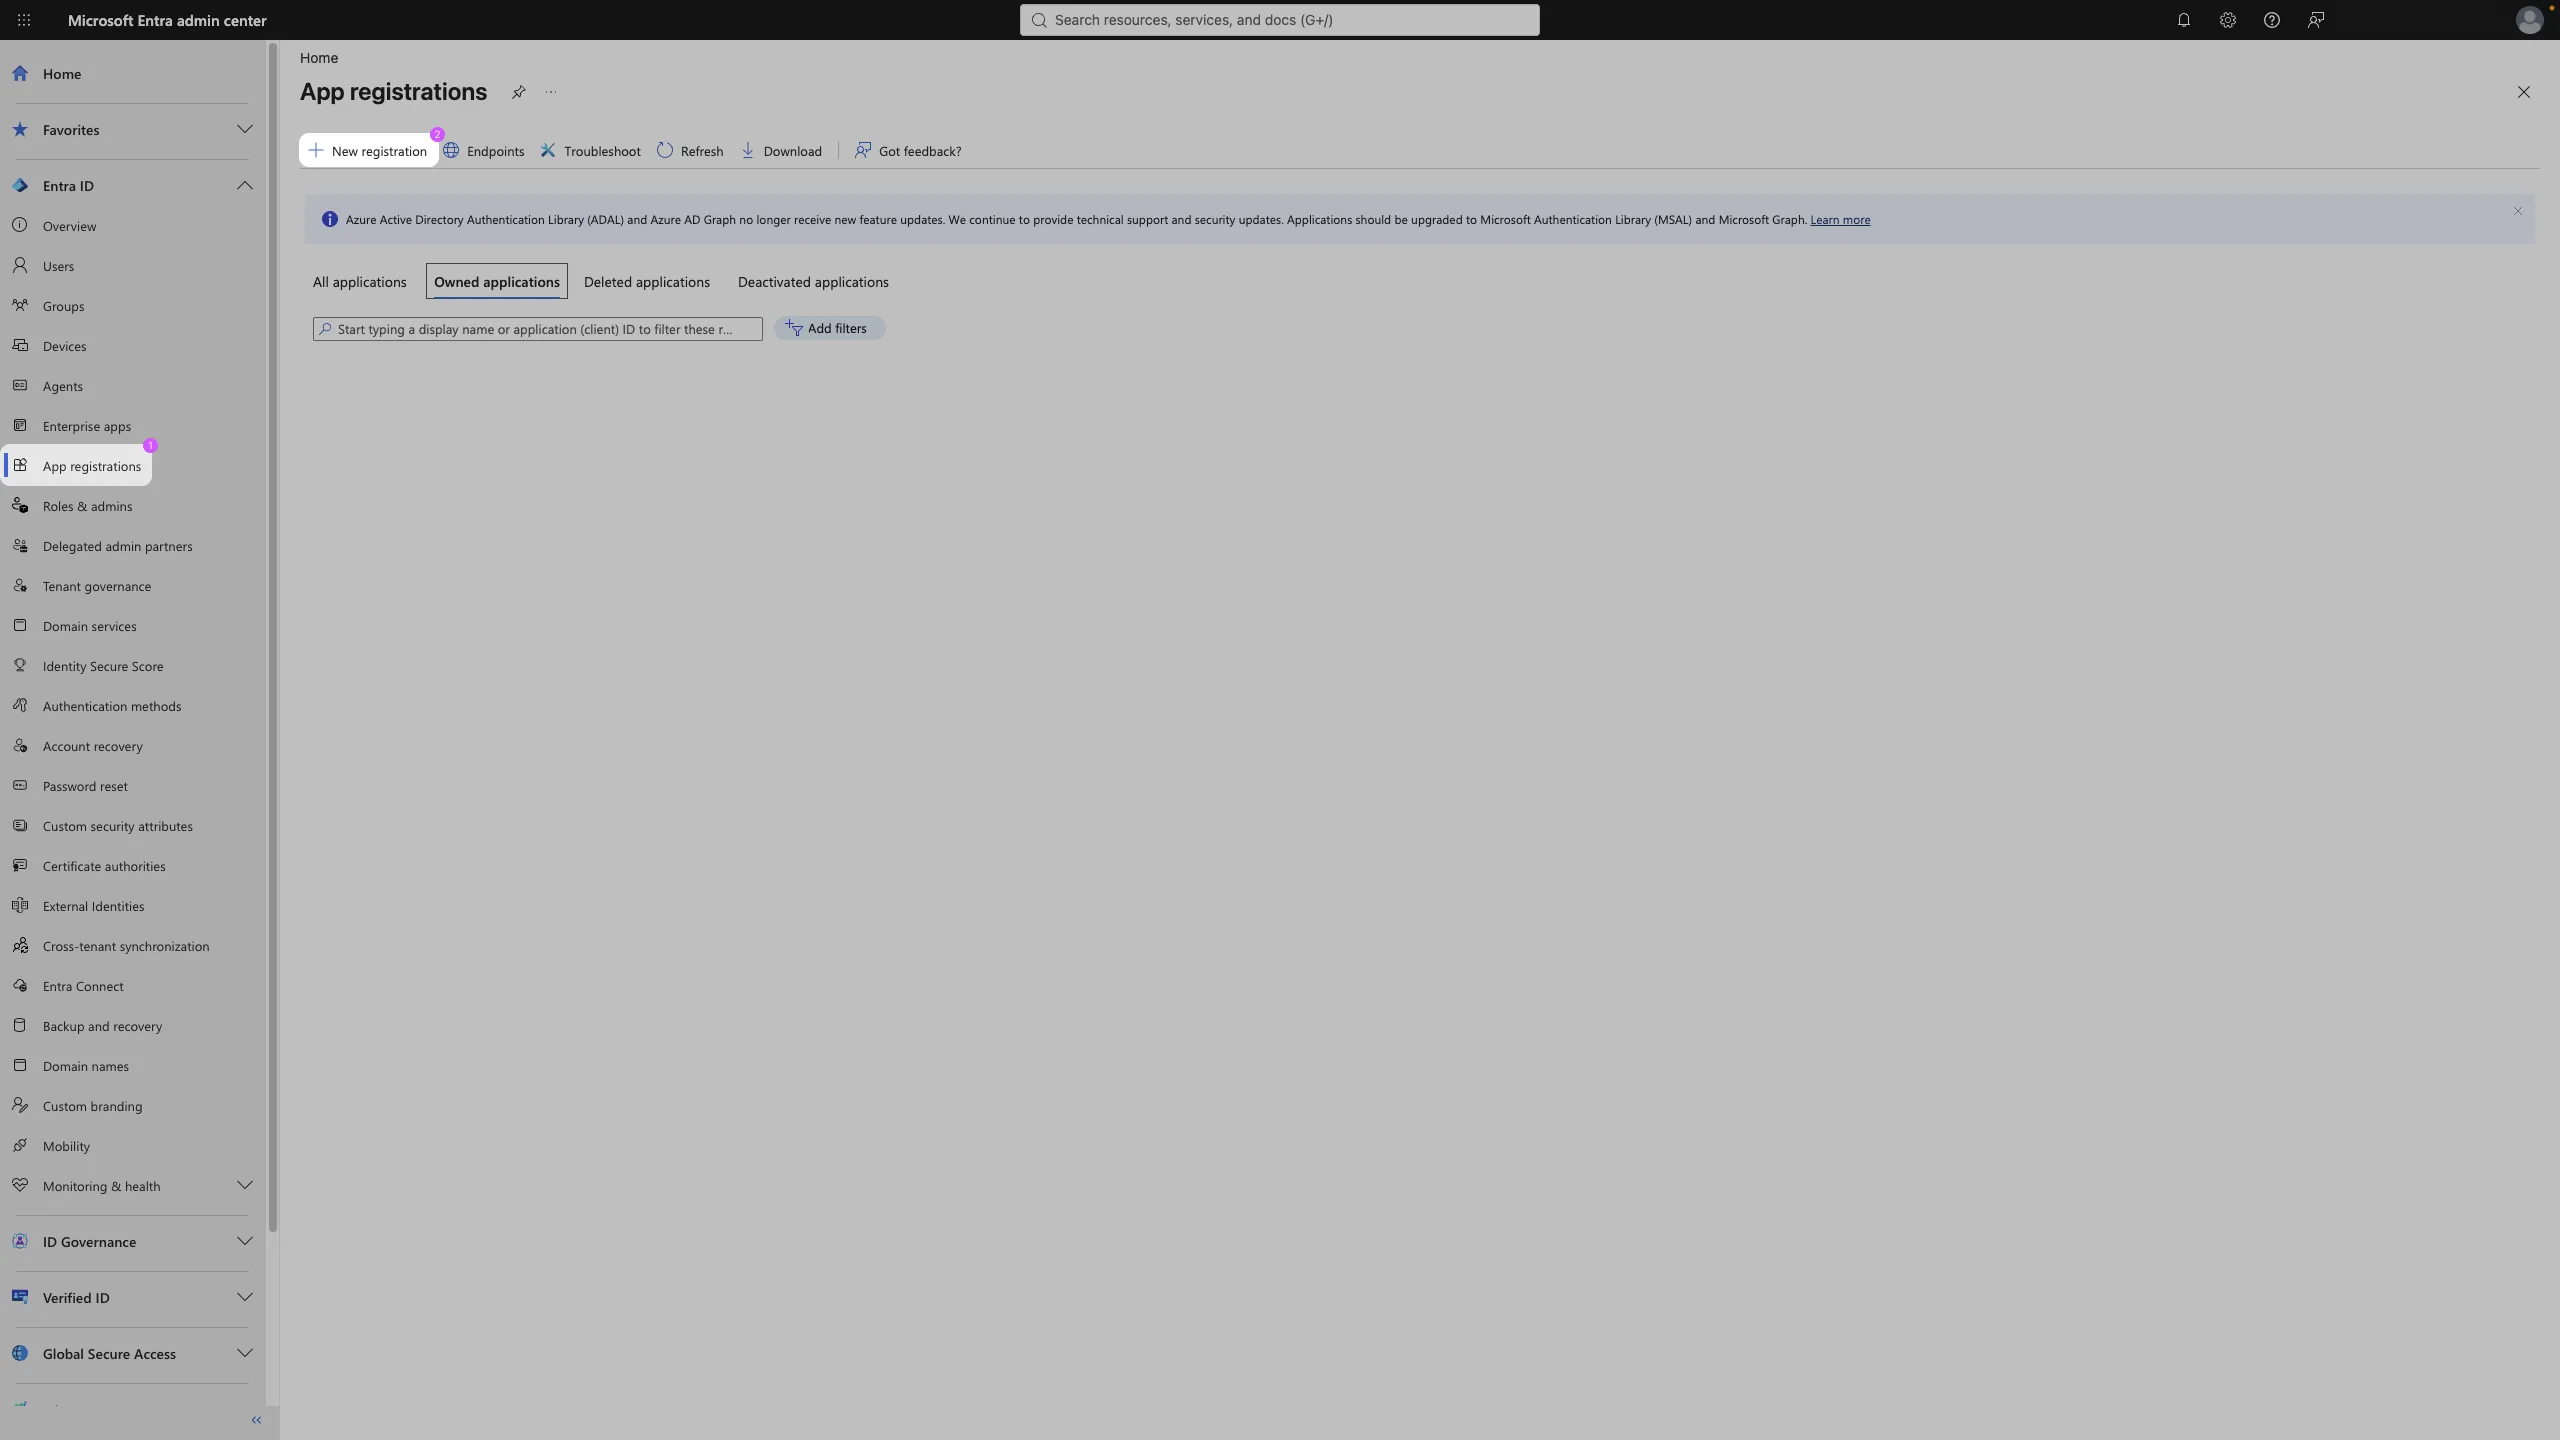
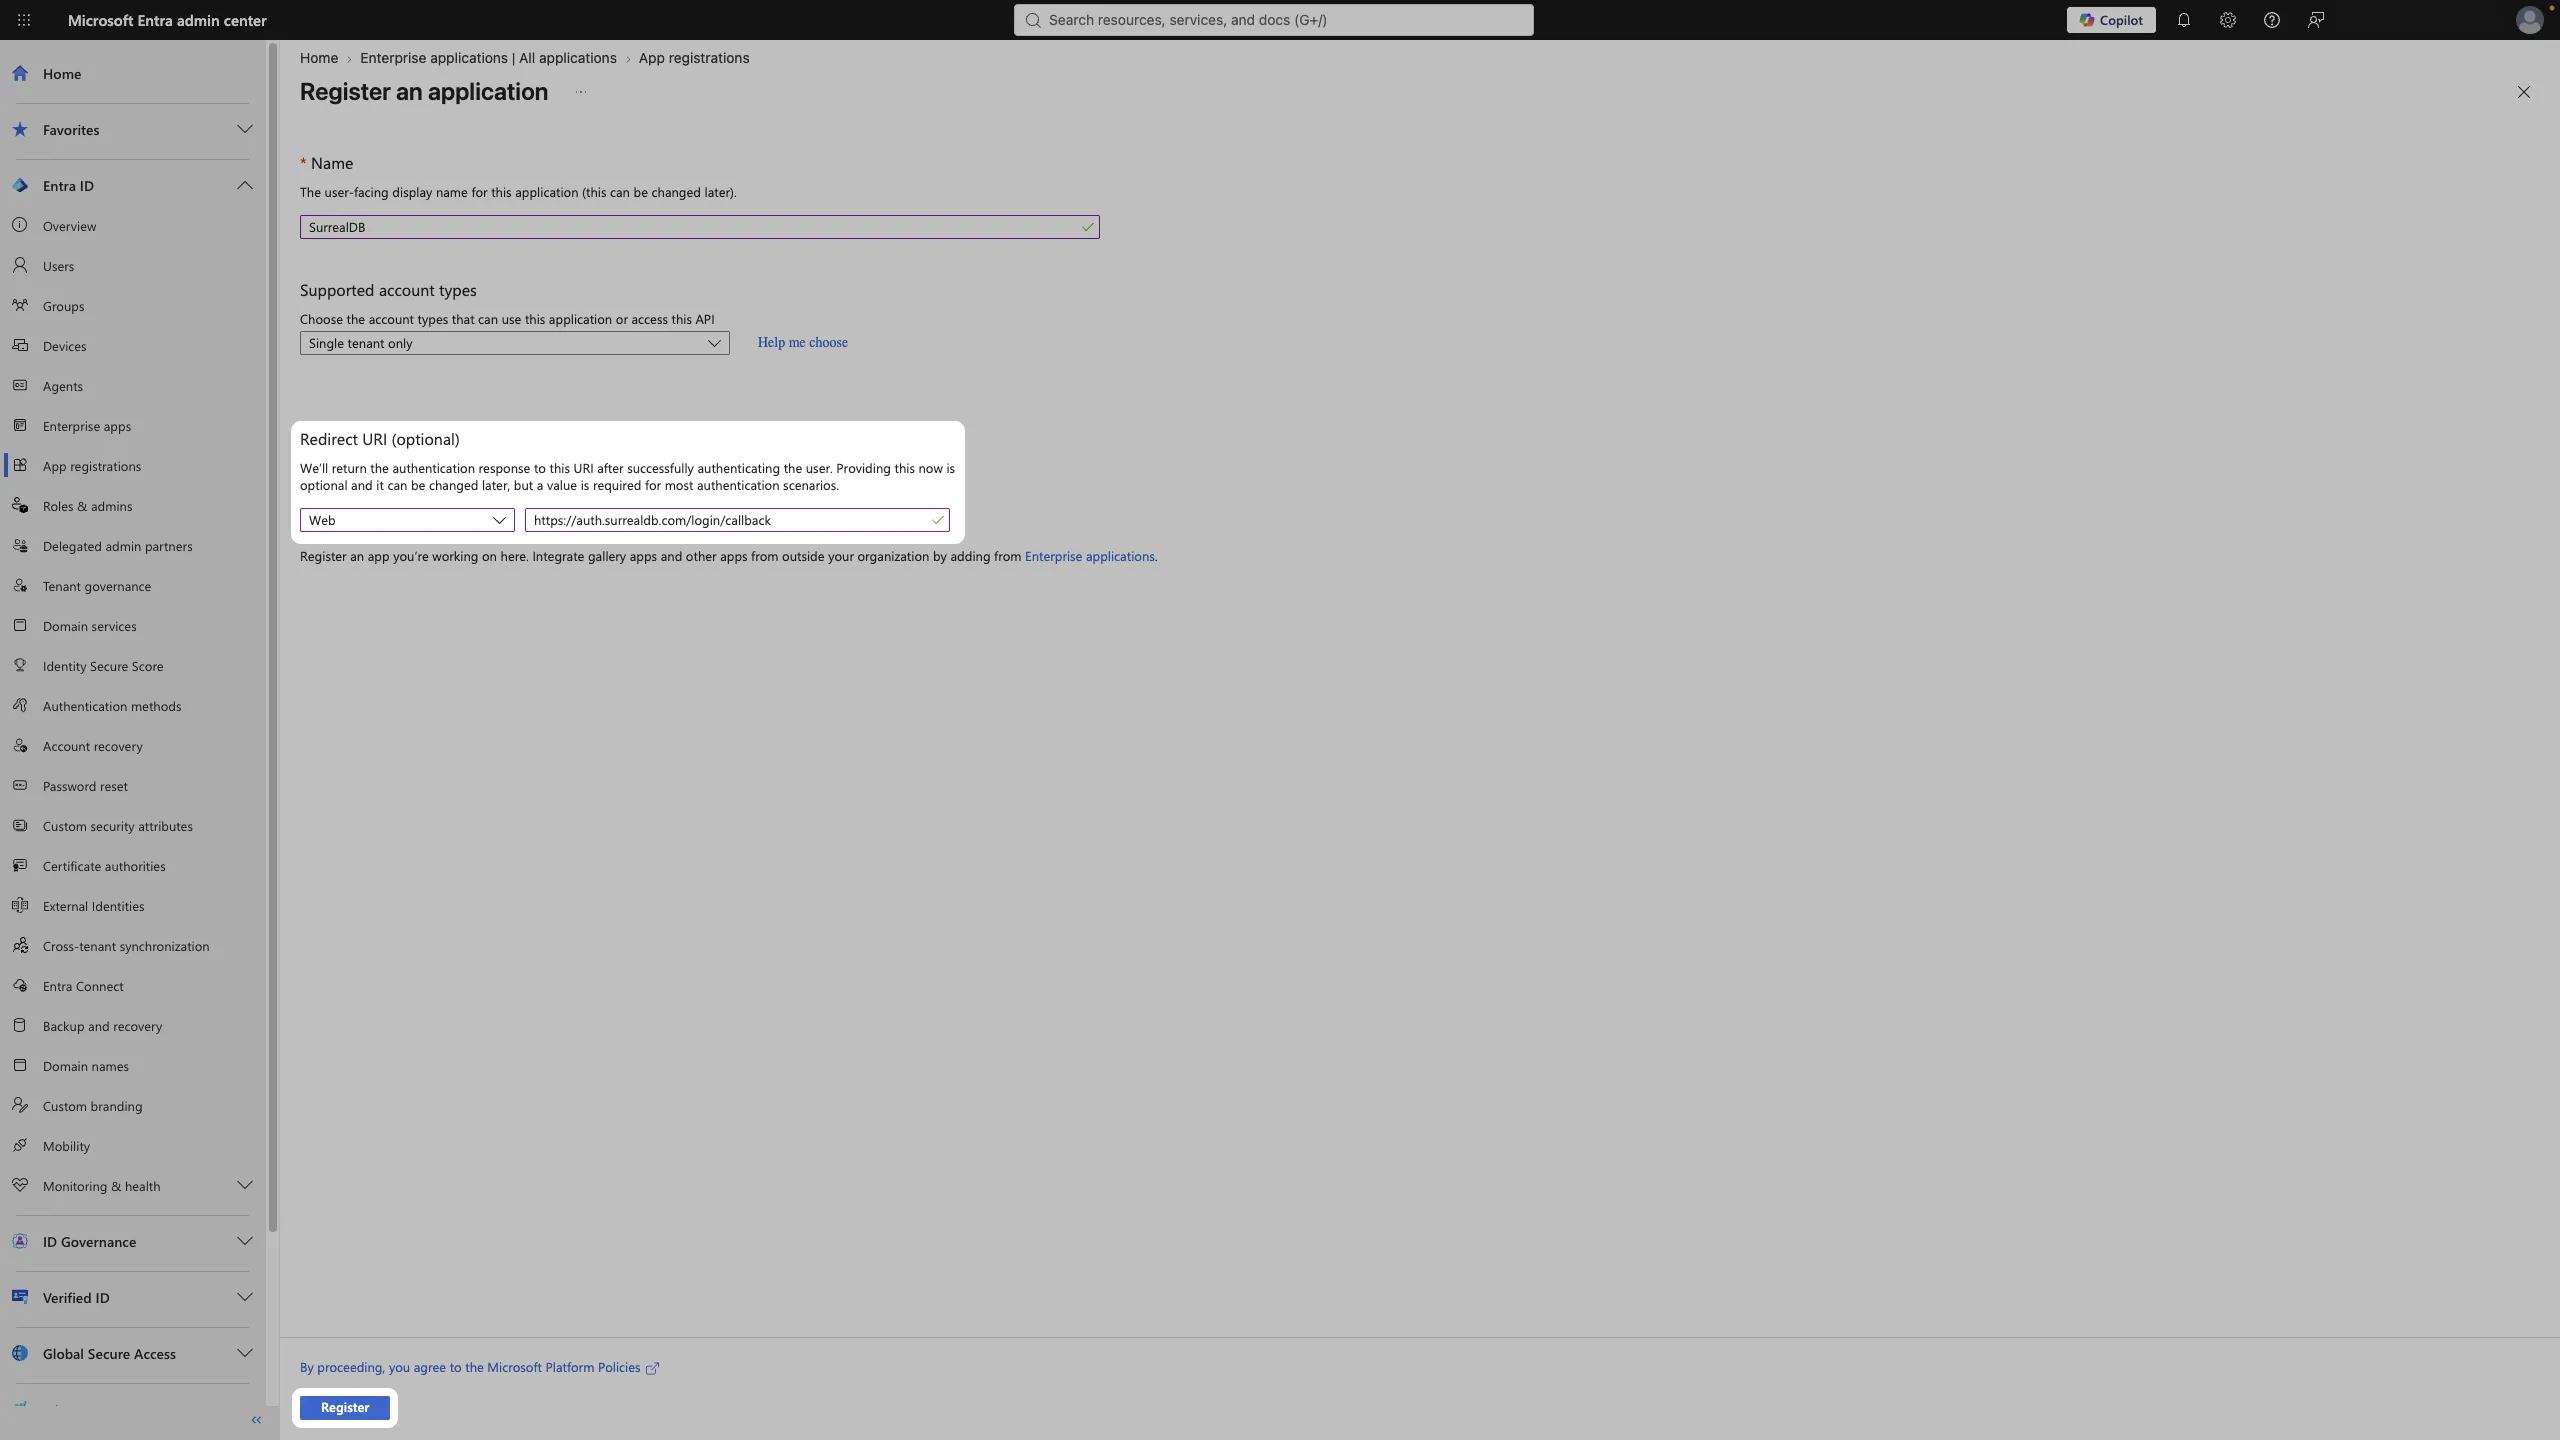
Enter a Name, for example
SurrealDB.Under Supported account types, select Single tenant only, so that only accounts in your directory can sign in.
Under Redirect URI, select Web as the platform and enter
https://auth.surrealdb.com/login/callback.Select Register.
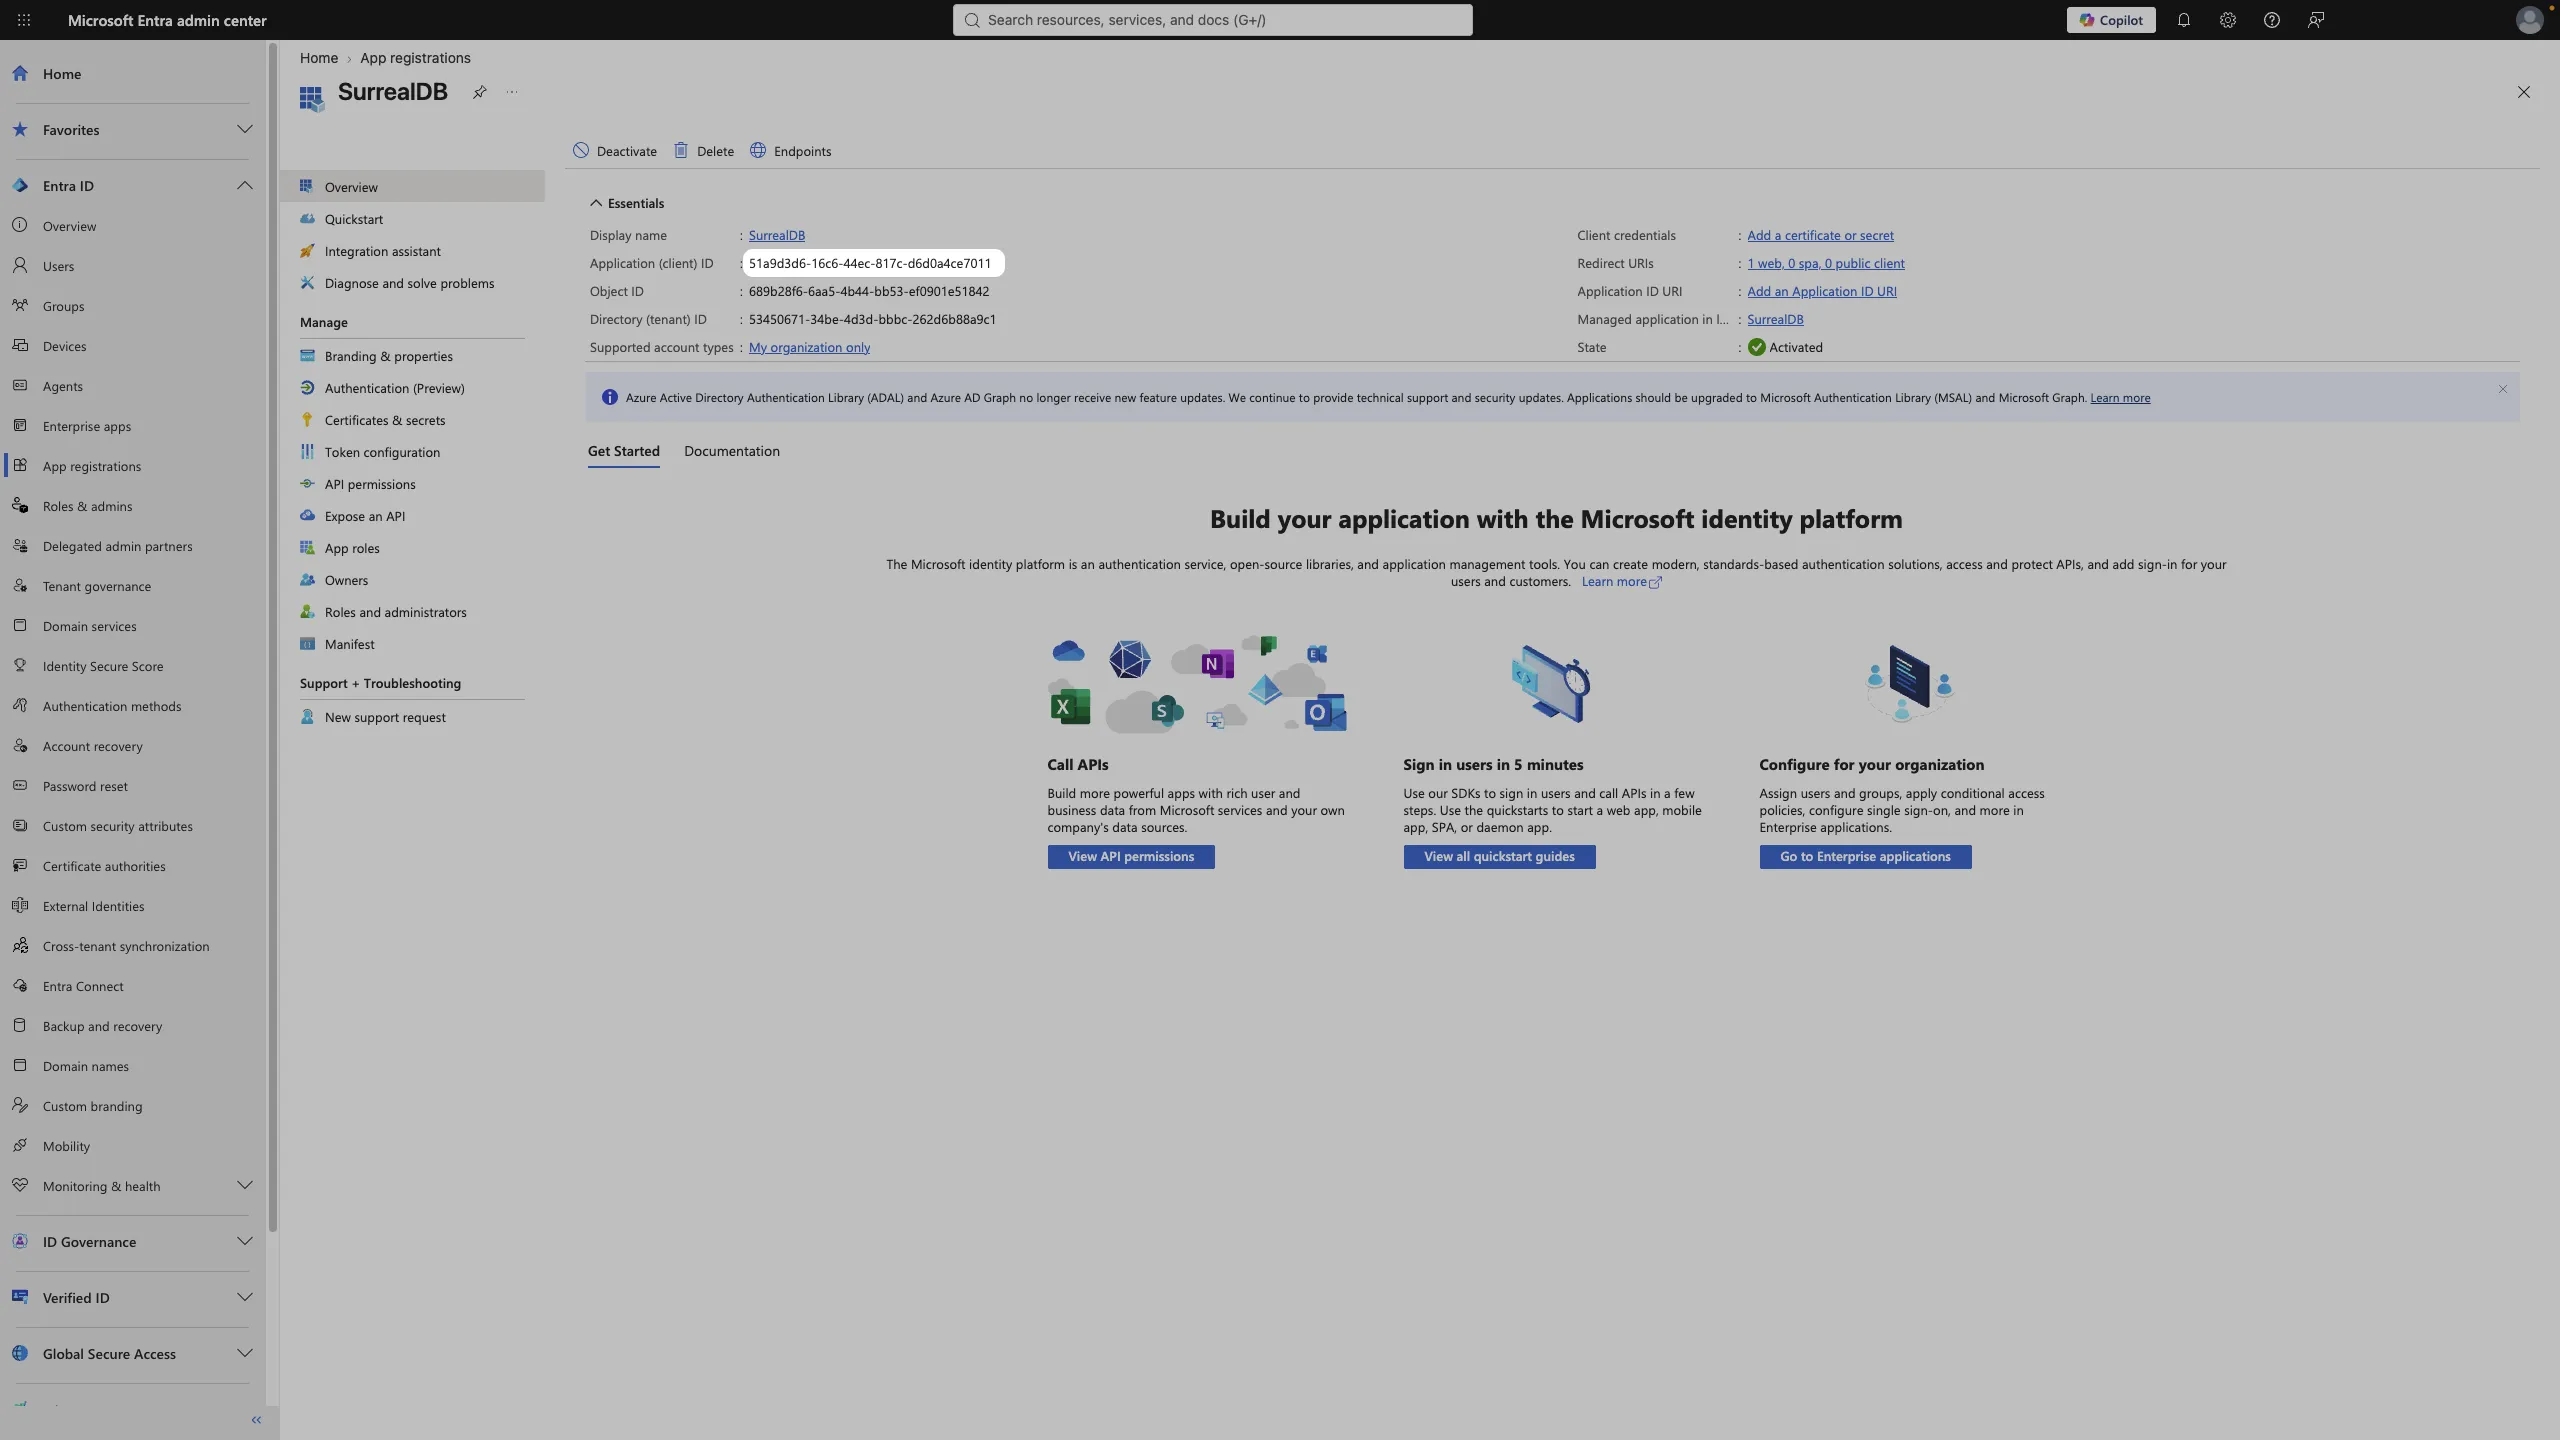
Step 2: Copy the application ID
Entra opens the Overview of the new application. Copy the Application (client) ID.
Step 3: Check the API permissions
Open API permissions and make sure the application has the delegated Microsoft Graph permission User.Read. A new registration usually has it already. If it is missing, select Add a permission, then Microsoft Graph, then Delegated permissions, and add User.Read.
Step 4: Create a client secret
Open Certificates & secrets.
On the Client secrets tab, select New client secret.
Enter a Description, for example
SurrealDB, and choose when it Expires.Select Add.
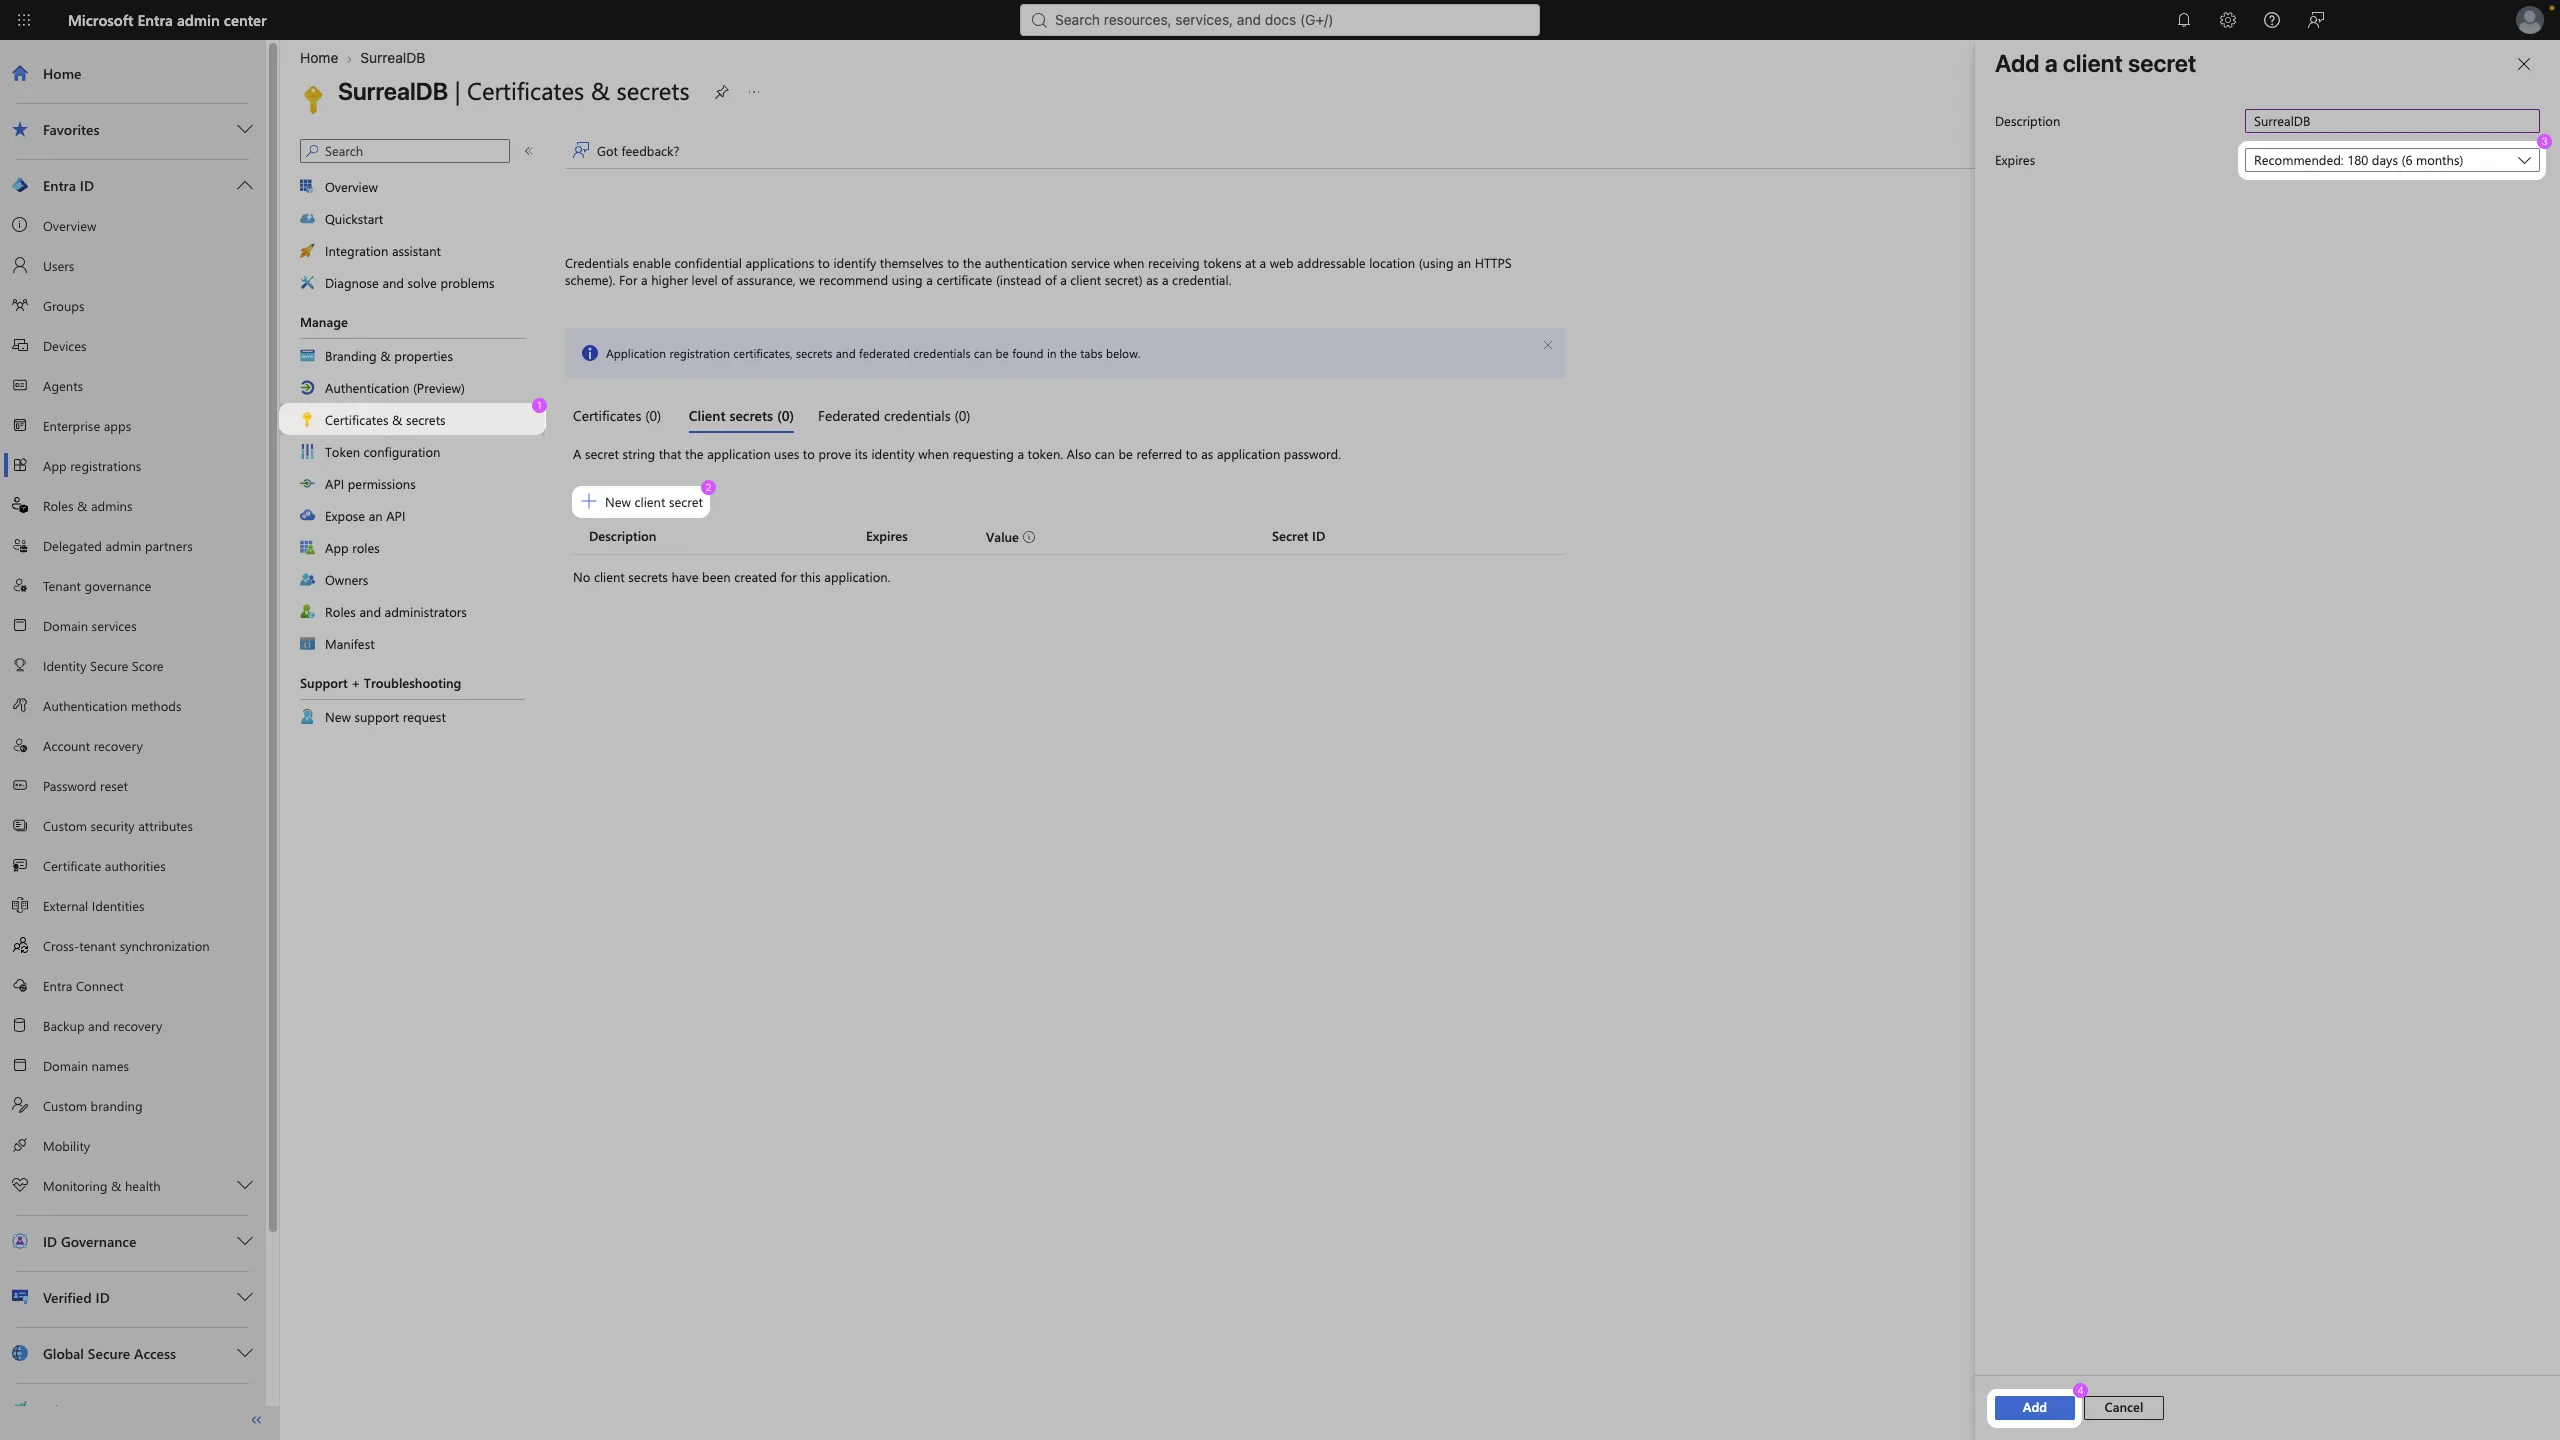
Copy the secret's Value, not its Secret ID. Entra shows the value only once, while you are still on the page.
Sign-in through this connection stops working on the date the client secret expires. Note the date, and create a new secret and update the connection in SurrealDB before then.
Step 5: Add the connection in SurrealDB
Open Single sign-on in your enterprise and add a new connection.
Select Microsoft Entra ID.
Under Name the connection, enter a Display name. Members see this name on the sign-in screen.
Under Enter the Microsoft Entra ID details, enter:
Directory domain: a domain of your directory, for example
example.onmicrosoft.com.Client ID: the application (client) ID from step 2.
Client secret: the secret value from step 4.
Under Route sign-in domains, select the verified domains to send to this connection. This is optional, and you can change it later.
Select Create connection.
The Set up Microsoft Entra ID section of the form shows the redirect URI, with a copy button beside it, if you need it again.
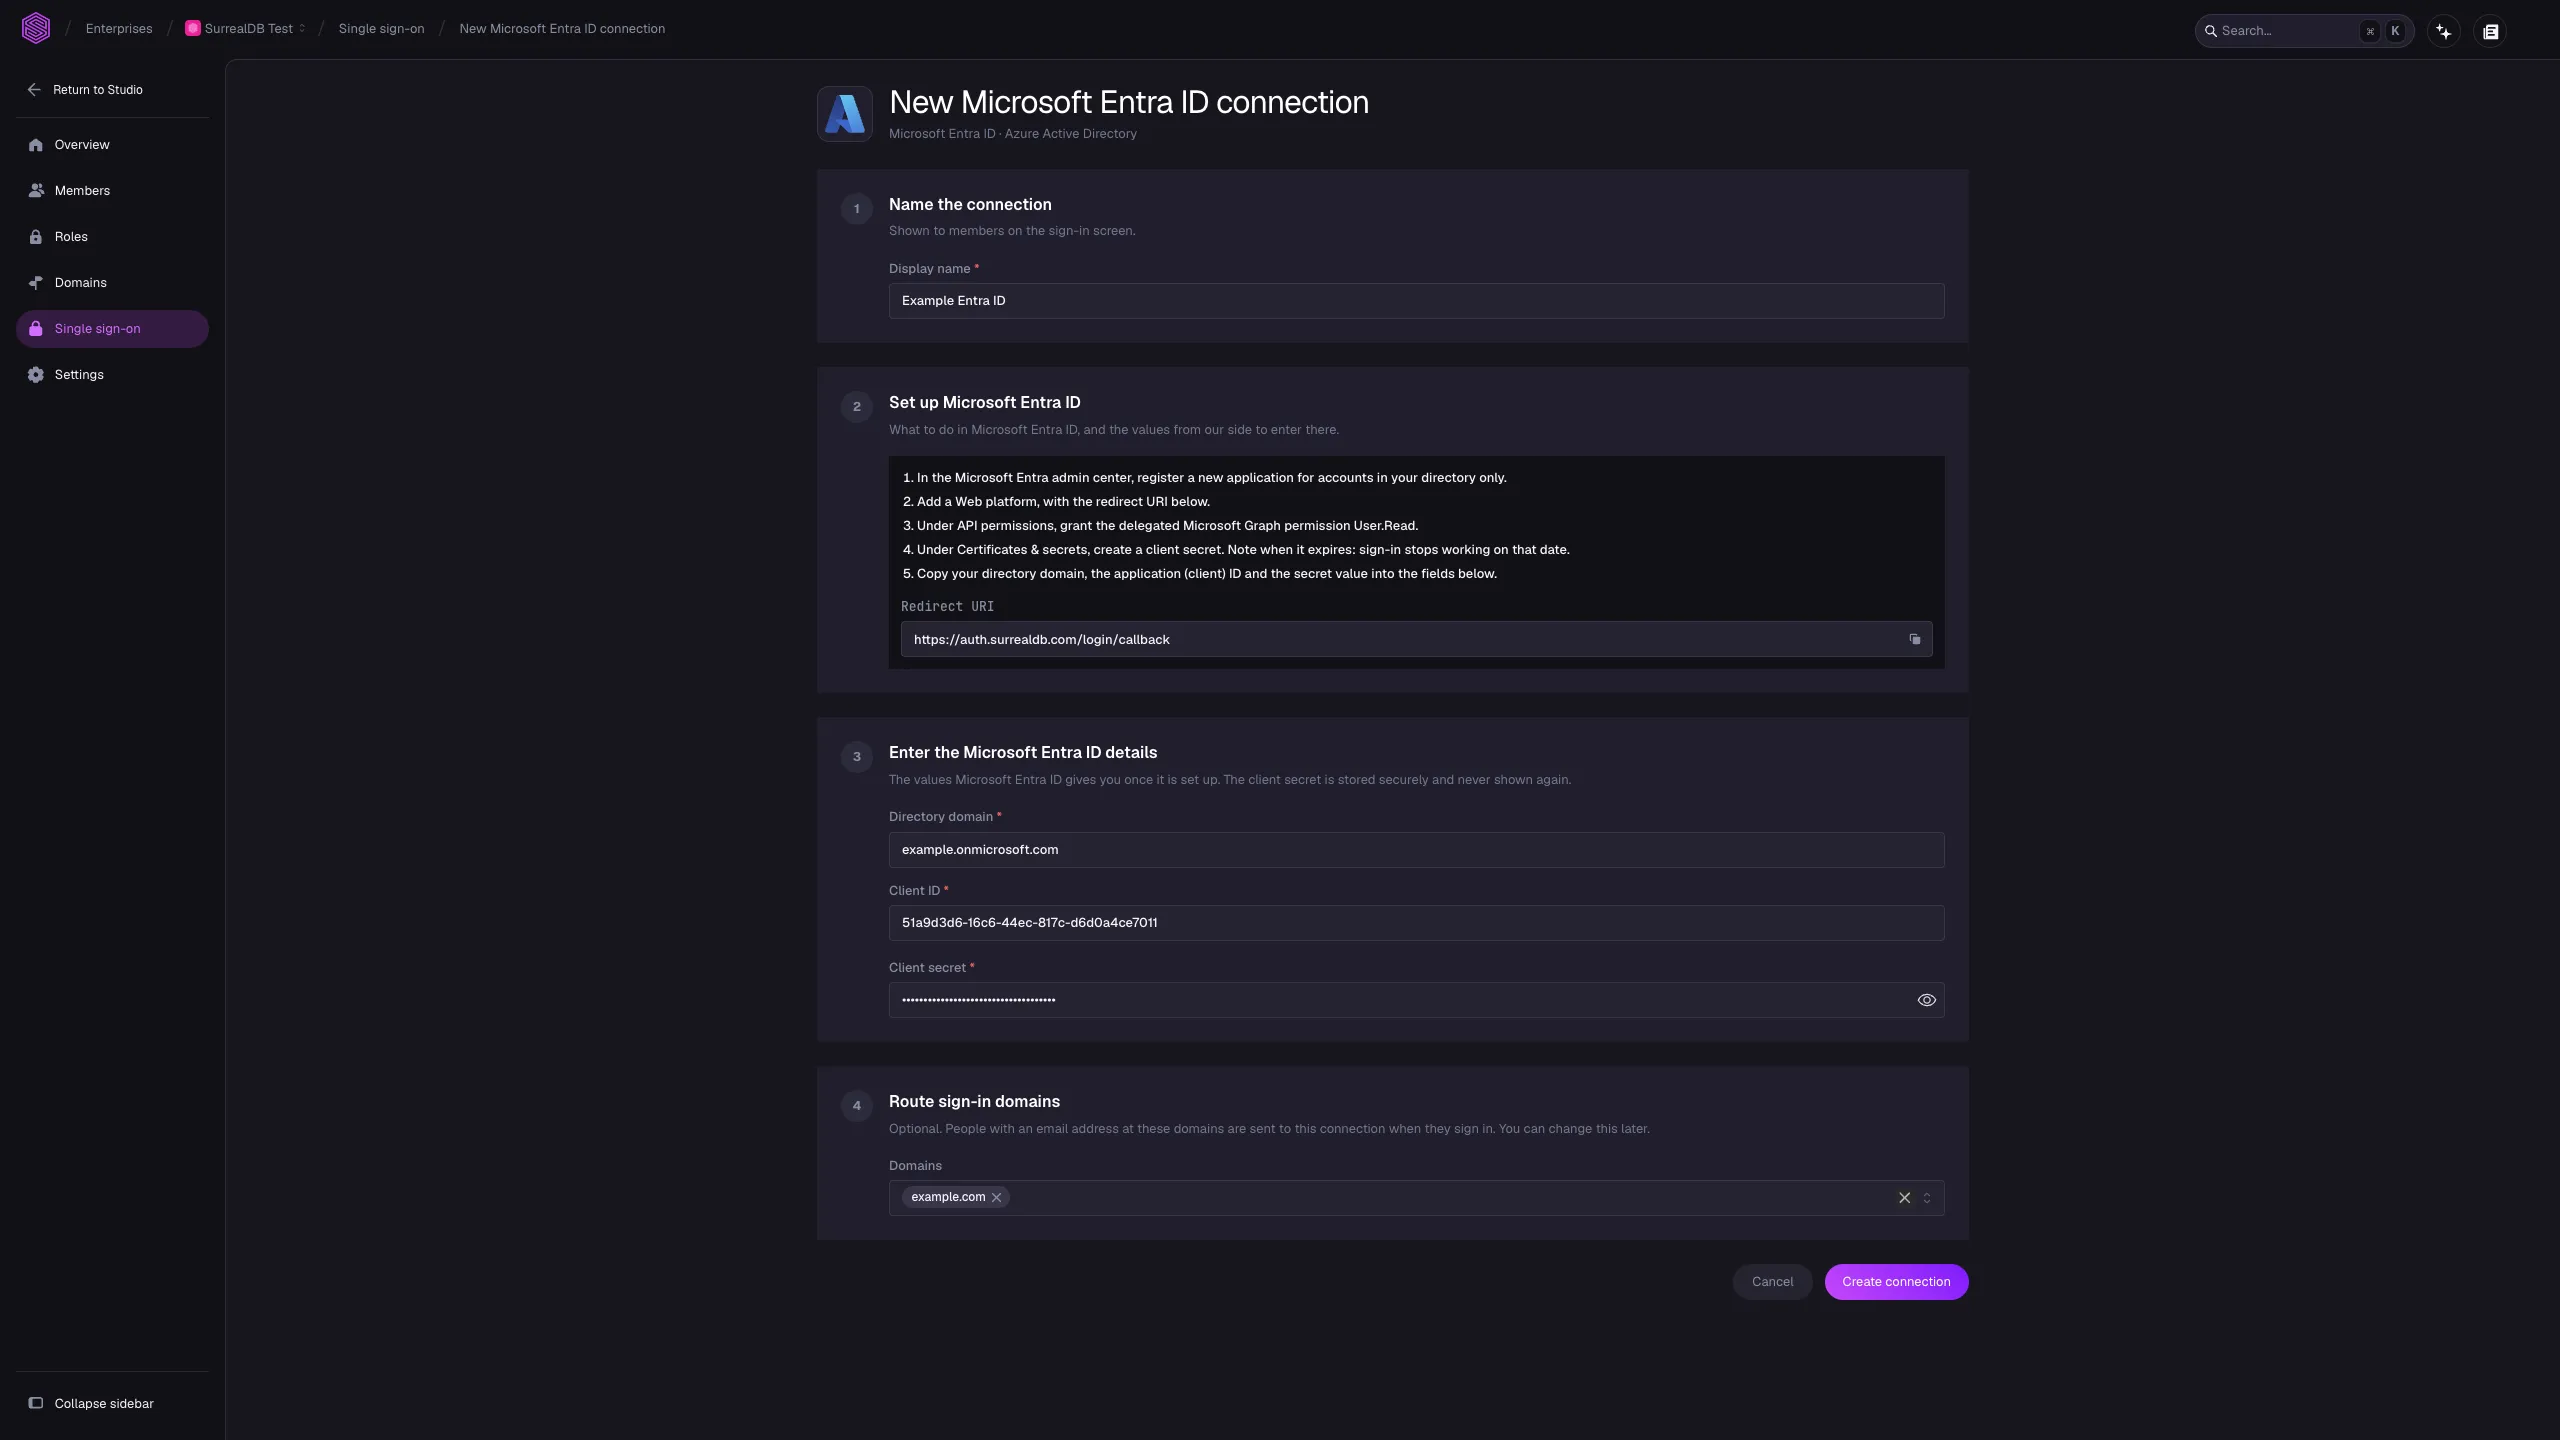
SurrealDB stores the client secret securely and does not show it again.
Step 6: Provision users with SCIM
With SCIM, Entra ID creates, updates and deactivates people's SurrealDB accounts. Skip this step if you do not want Entra ID to manage accounts.
Entra ID provisions users through an enterprise application. This is separate from the app registration that you made in step 1.
In Studio, turn on SCIM and create a token for this connection. Keep the SCIM base URL and the token ready.
In the Microsoft Entra admin center, open Enterprise applications, then select New application.
Select Create your own application.
Enter a name, for example
SurrealDB provisioning.Choose Integrate any other application you don't find in the gallery, then select Create.
Open Provisioning, and set Provisioning Mode to Automatic.
Set Tenant URL to the SCIM base URL, followed by
?aadOptscim062020.Set Secret Token to the token.
Select Test Connection, then Save.
Under Mappings, open the mapping for users.
Change the source attribute of
externalIdtoobjectId, then save.Assign the same people or groups as the app registration.
Set Provisioning Status to On, then save.
Map objectId to externalId before you turn provisioning on. SurrealDB identifies an Entra ID user by their object ID at sign-in. The default mapping sends a different value, and each person then gets a second account the first time they sign in.
The ?aadOptscim062020 suffix makes Entra ID follow the SCIM 2.0 standard for updates. Without it, some changes do not reach SurrealDB.
To try one person before everyone, open Provisioning and select Provision on demand.
Next steps
If you did not route a domain when you created the connection, route one now.
Choose the applications that people can sign in to with this connection.
Read what SurrealDB does with each SCIM change, and how to rotate a token.